Tales From a Backyard Front: Experiences & Insights from Colorado’s Intellectual and Developmental Disabilities System
Creative Break! Destination Tickets
NOTE: Arc Thrift Stores is not responsible for the content of guest blogs that appear on the site.
Guest Blog by Jo Booms
It was par for the course, but that was the problem. Agnes* (Name has been changed to protect confidentiality"), a woman with an intellectual and developmental disability (IDD), had gotten into the van and was scared she might be being taken back to her old institution. Staff always told Agnes where she was going, but Agnes had staff in the past that had undermined her trust in present staff. Agnes lived across town from her day program, so daily to-and-from trips were involved. Additionally, the day program sometimes had outings. On all these trips, Agnes was frightened.
Like everyone, people with IDD can have a hard time with uncertainty. Lessening uncertainty is helpful in everyday dealings with people with IDD. The solution to helping Agnes lessen her uncertainty around car trips was simple – staff bought index cards and made “tickets” out of them. Each ticket had a sticker representing her destination: a house sticker for her trip home, a chicken sticker for a farm the day program clients liked to visit, and a written note stating the destination to keep her reading skills up. This way, if Agnes was unsure about trusting staff, she could verify where staff told her she was going by looking at her ticket. The system worked well, lessening Agnes’ uncertainty and helping her build more trust with current staff.
The same thing would make a great DIY project with kids who are working on reading or picture identification skills and who would enjoy having “tickets” for car, bus, or plane trips to help ease their own uncertainty. These might be especially helpful for long trips, which could be broken up into destination cities along the way.
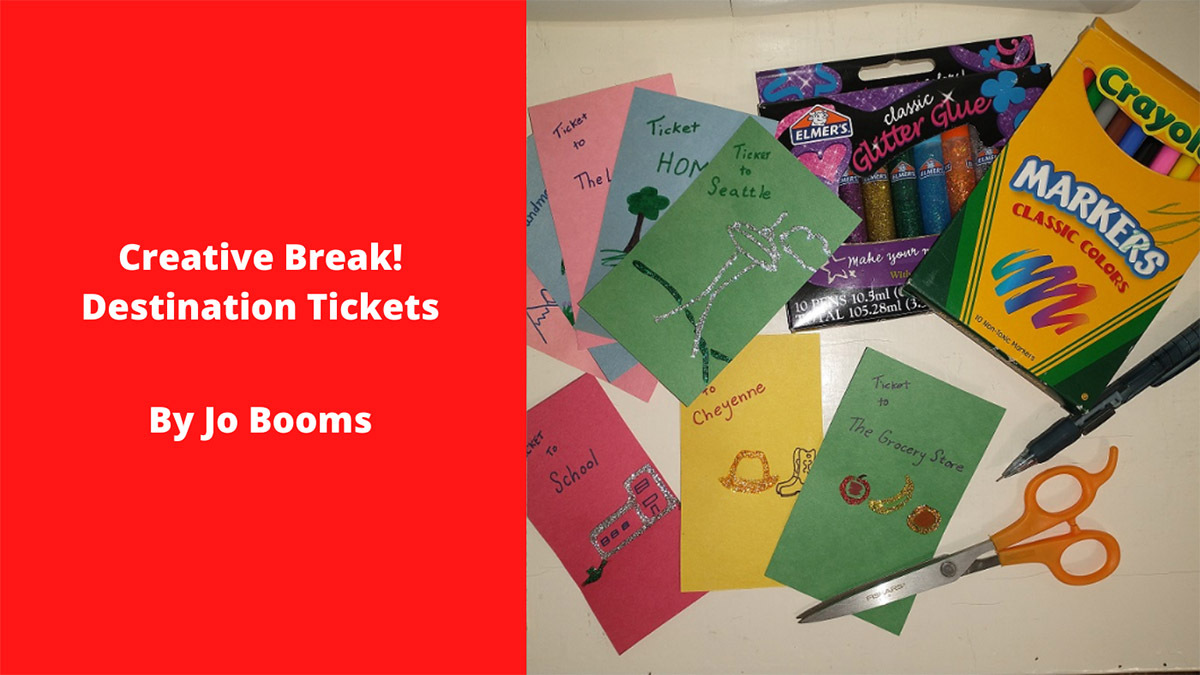
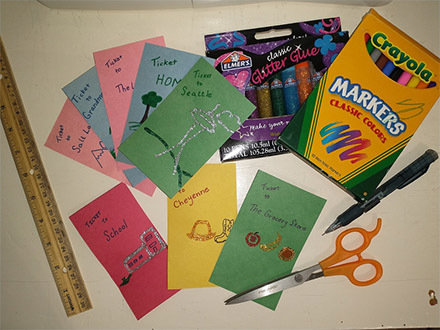
You will need:
- A ruler
- Pencil & eraser
- Construction paper or card stock
- Stickers or drawings to represent destinations
- Magic markers or crayons
- Glue or glue sticks
- Glitter, fabrics, yarn, or anything else you want to jazz up the tickets with!
If making an optional felt ticket holder, you will need:
- Three 9” by 12” pieces of felt (one for the backing and two to make pockets)
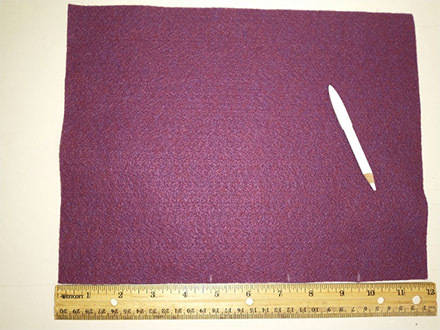
- Dressmaker’s pencil or disappearing-ink marker (air soluble marker)
Instructions:
- Decide what each ticket’s destination will be.
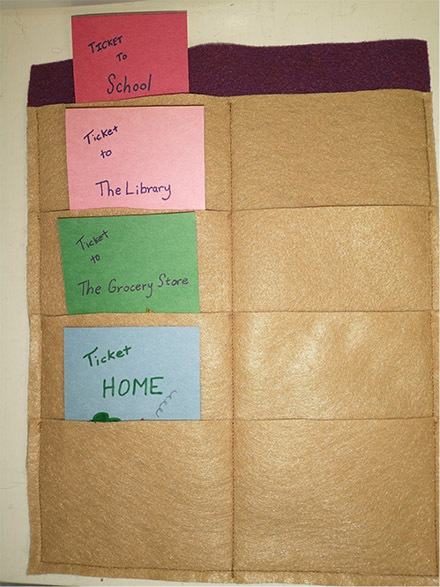
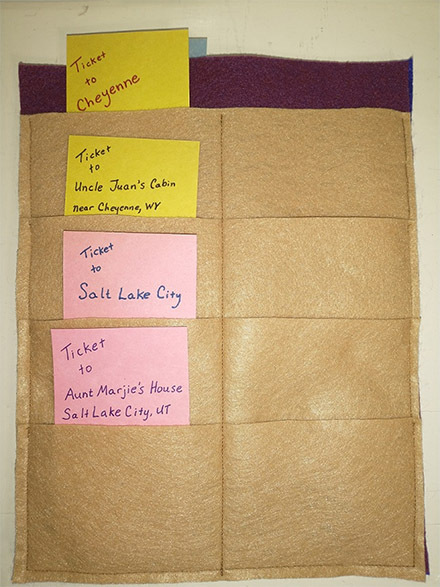
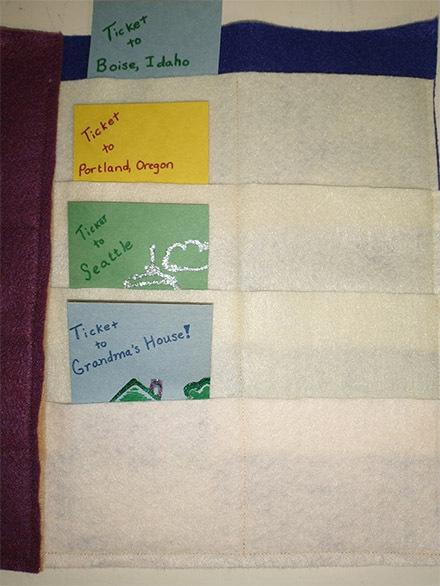
- Using card stock or construction paper, measure and cut each ticket so each is 4 “ by 3”.
- Pick a sticker or draw a picture to represent that destination (such as a building for school, a house for the trip home, or the Space Needle to represent Seattle for your trip to visit Grandma).
- Write the destination at the top of each ticket.
- Use fabrics, yarn, or glitter to jazz up each ticket.
Optional felt ticket holder:
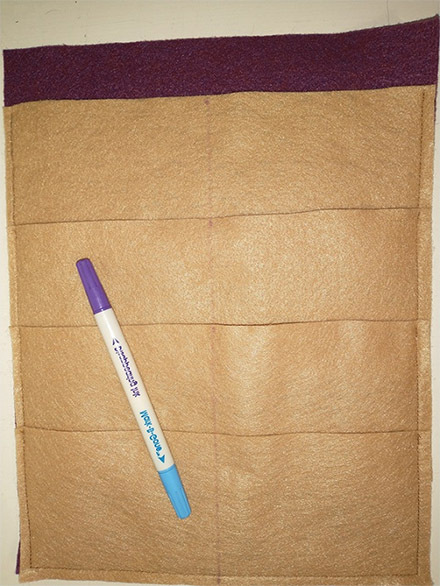
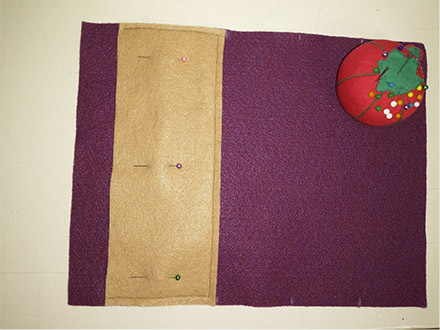
- Decide which felt piece you will use for the backing, and which two you will cut strips from to make pockets to put the tickets in.
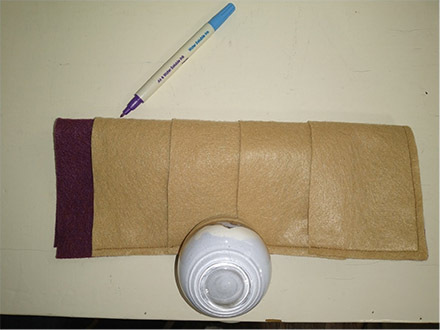
- Take one of the pocket material pieces. Lay a ruler against the long edge. Make a mark every 3.5” along the first piece. Repeat for the opposite long edge. Connect the marks so that the piece is measured into three 3.5” strips with a little felt left over. Mark one 3.5” strip on the second piece of pocket fabric, using the same method.
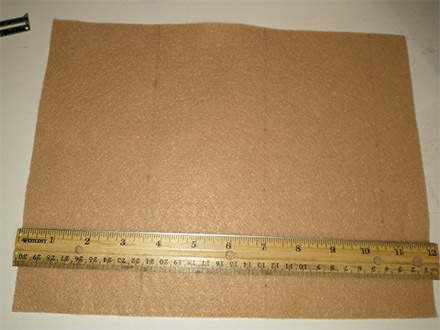
- Cut each pocket strip along the marked line.
- Take the felt backing piece and lay a ruler along the long side. Make a mark at 4.75 inches, 7.25 inches, and 9.5 inches. Lay the ruler along the other long side and repeat.
- Align the first pocket strip across the backing felt, with the bottom of the pocket at the 4.75 inches mark. Pin it in place and then sew along the bottom and both sides to form the top pocket.
- Align the next pocket strip with the bottom at the 7.25” mark, pin and sew bottom and sides. The top of each pocket will overlap the bottom of the pocket above it. Align the bottom of the third pocket at the 9.5” mark, pin and sew sides and bottom. Align the bottom (last) pocket with the bottom of the backing felt, then pin and sew sides and bottom.
- Fold the resulting sheet of pockets in half lengthwise and mark the midpoint at the top of each pocket. Use ruler to connect the midpoint marks, then sew up the midline from bottom to top to make two side-by-side rows of pockets.
- Put the destination tickets in the left-hand side pockets in order and you’re ready to travel! Once you get to each destination, switch its destination ticket to the right-hand side to show you’ve been there. Note: for longer trips, simply make 2 pocket sheets and sew them together along the left-hand side!