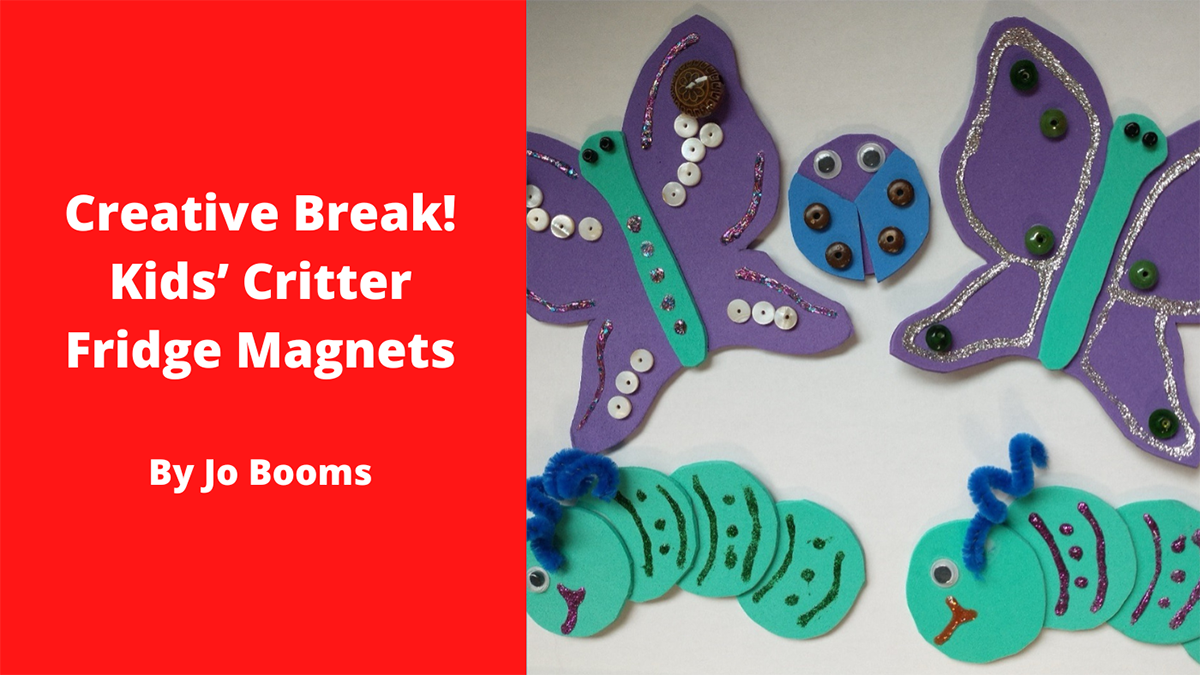
Creative Break! Kids’ Critter Fridge Magnets
NOTE: Arc Thrift Stores is not responsible for the content of guest blogs that appear on the site.
Guest Blog by Jo Booms
Here’s a fun, creative summer project for kids. Critter fridge magnets are limited only by your imagination – you can make any critter under the sun!

You will need:
- A pencil
- A small glass
- Sharpie pens or Elmer’s Glitter Glue
- Something to make your critters out of – check your local ARC Thrift store for materials! I used craft foam, but any stiff material will do.
- Something to decorate your critters with – I used glitter glue and beads I found at my local ARC Thrift store.
- Googly eyes or beads for eyes
- Pipe cleaners
- Elmer’s School Glue
- Magnets – I cut up some of the advertisement magnets that come with my phone book, but you can use regular magnets just as well.
Ladybug:
- Place the small glass open-end down on the material you want to use for the ladybug’s body.
- Using the Sharpie pen or a pencil or fabric marker, trace around the small glass so that you have drawn a circle on your material. This will be the ladybug’s body.

- Cut out the ladybug’s body.
- Place the small glass open-end down on the material you want to use for the Ladybug’s carapace (the shell-like covering over the wings).
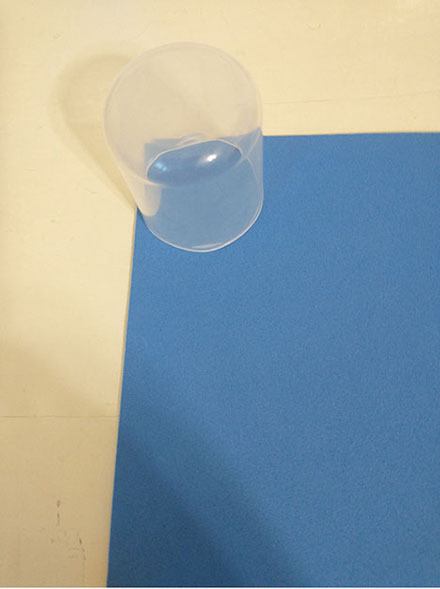
- Using the Sharpie or a pencil or fabric marker, trace around the glass so you’ve drawn a circle on your material.
- Cut out the circle.
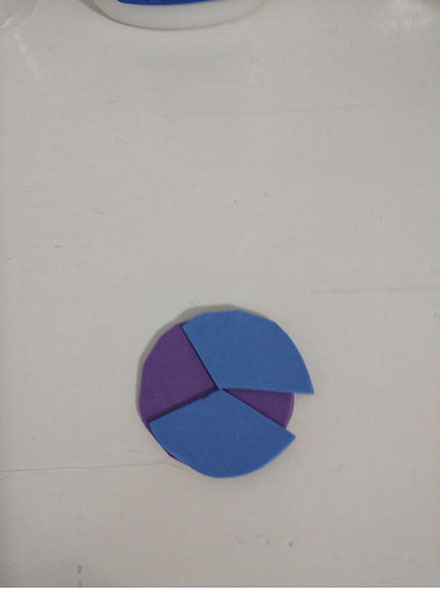
- Divide the circle into three parts as shown.
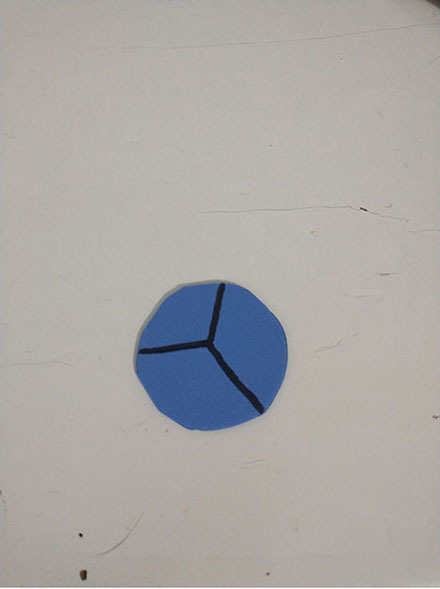
- Cut away the smallest of the three parts of your circle. Then cut along the last line to free the two halves of the carapace.
- Glue the two halves of the carapace onto the ladybug body as shown. You can glue them so that they are together, or you can glue them slightly apart as I’ve done to make it look like the ladybug is about to fly. Let the glue dry thoroughly.
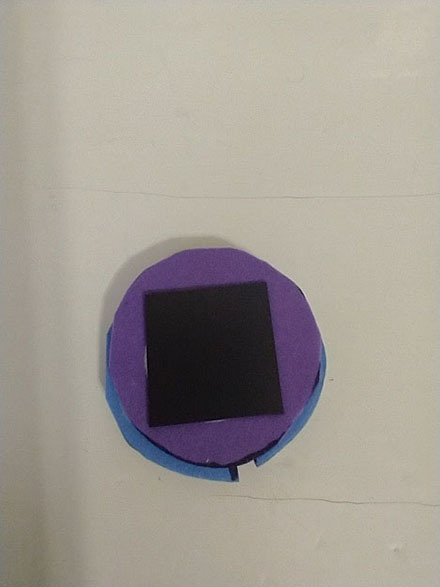
- Turn the ladybug over so its underside is showing. If using cut advertisement magnets, cut a piece of magnet almost as big as the ladybug. Glue your magnet to the underside of the ladybug. Let the glue dry thoroughly.
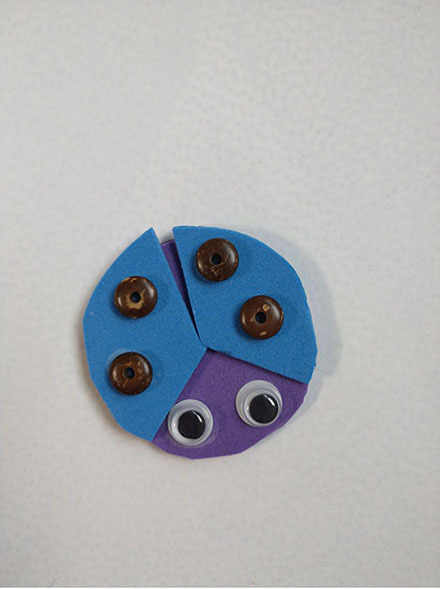
- Turn the ladybug back over so it is right-side up. Glue on its eyes. Let the glue dry thoroughly.
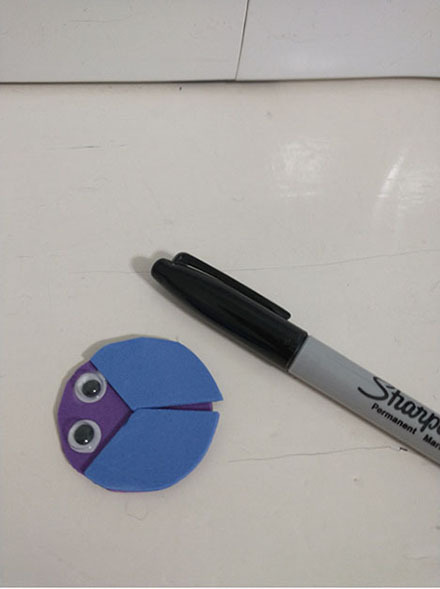
- Glue beads on the ladybug’s carapace for spots. Let the glue dry thoroughly.
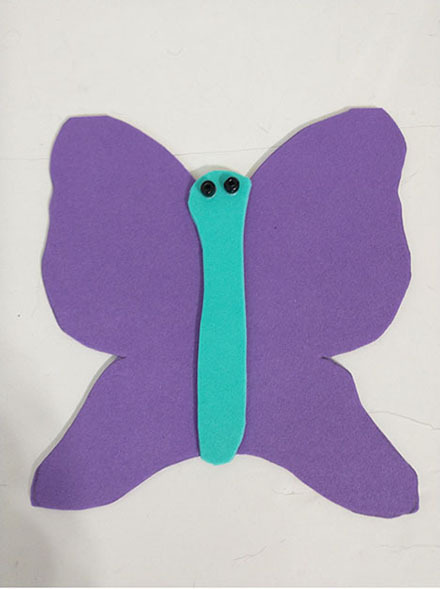
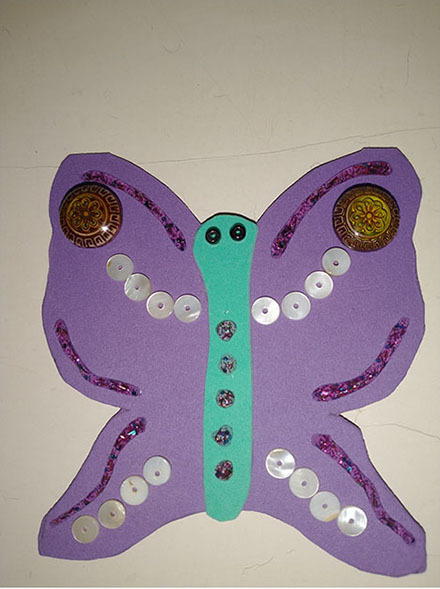
Large Butterfly:
- Draw a butterfly outline on paper for a pattern.
- Put the paper pattern on the material you wish to use for the butterfly’s wings.
- Use a pencil or pen or fabric marker to draw around the pattern.
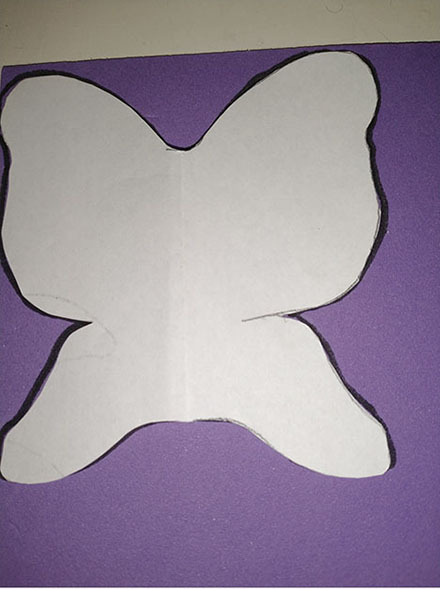
- Cut out the butterfly wings.
- Draw a butterfly body on the material you want to use for the body.
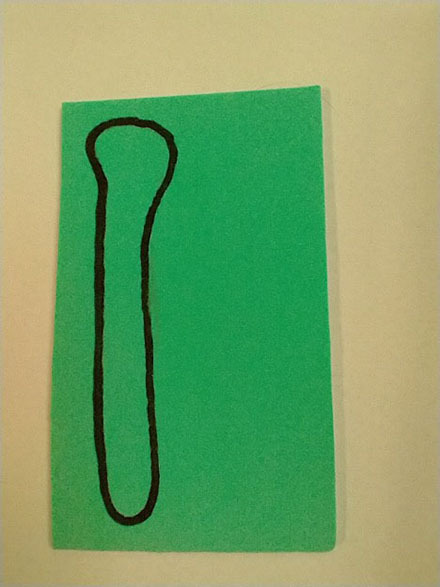
- Cut out the butterfly body.
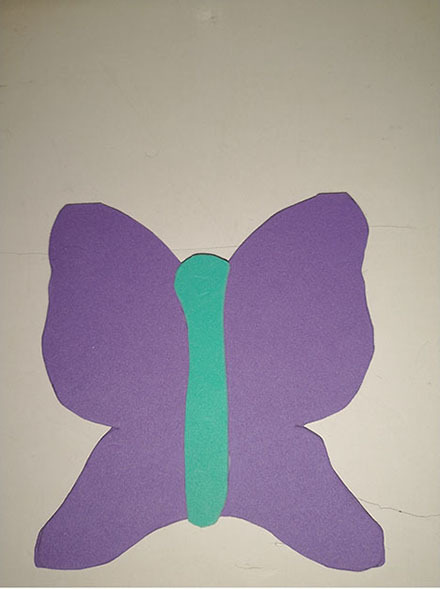
- Glue the butterfly body atop the butterfly wings as shown. Let the glue dry thoroughly.
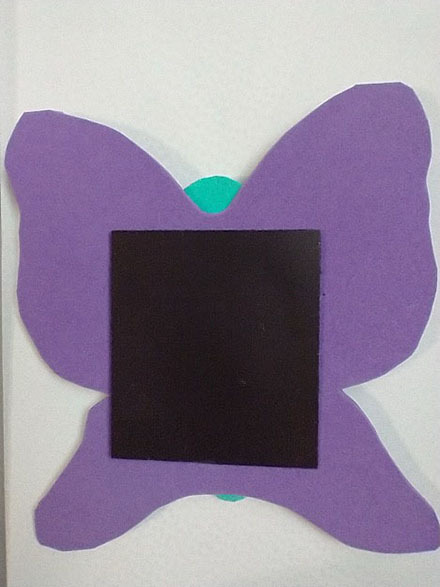
- Turn the butterfly over and glue your magnet onto the underside of your butterfly. Let glue dry thoroughly.
- Glue eyes onto the butterfly body.
- Decorate the butterfly wings using beads or glitter glue or both.
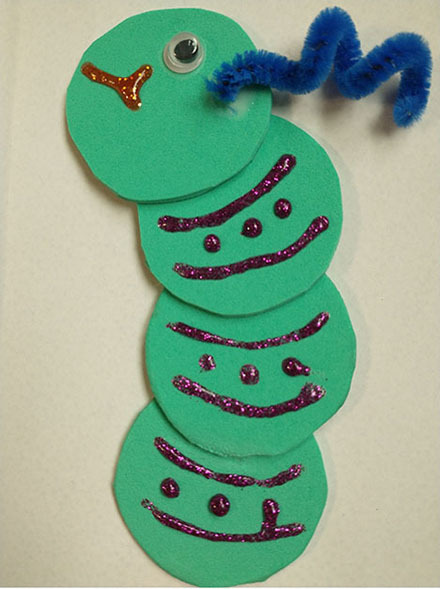
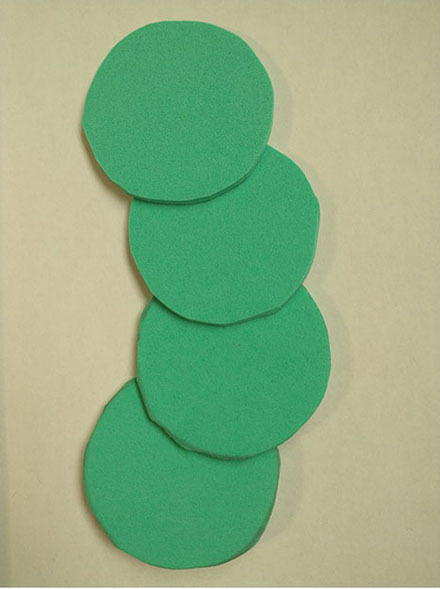
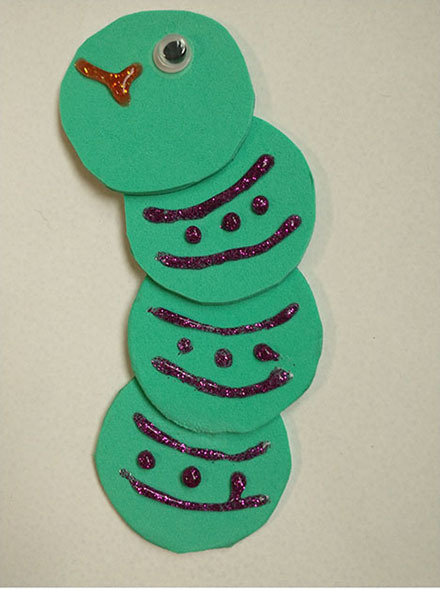
Caterpillar:
- Put the small glass upside-down on the material you want to use for your caterpillar. Trace around the glass four times to make four circles.
- Glue the four circles overlapping each other slightly as shown. Let glue dry thoroughly.
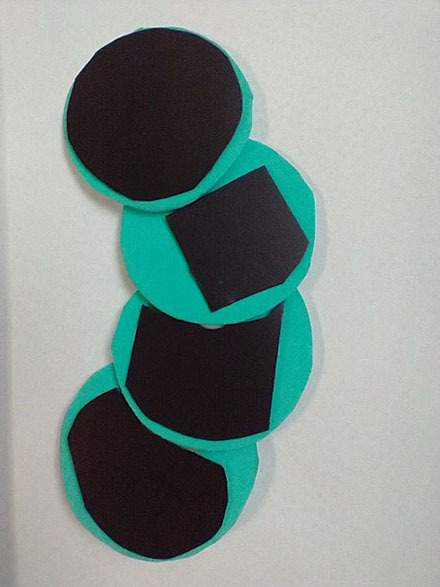
- Turn your caterpillar over and glue a magnet to each segment of your caterpillar’s underside as shown. Let glue dry thoroughly.
- Turn your caterpillar right-side up. Glue the eye onto the caterpillar’s head.

- Draw a mouth on the caterpillar with a pen or Elmer’s Glitter Glue. Draw markings on the caterpillar’s body.
- Take a pipe cleaner and wrap it around a pencil. This will be your caterpillar’s antenna. Cut the pipe cleaner to the length you want the antenna to be.
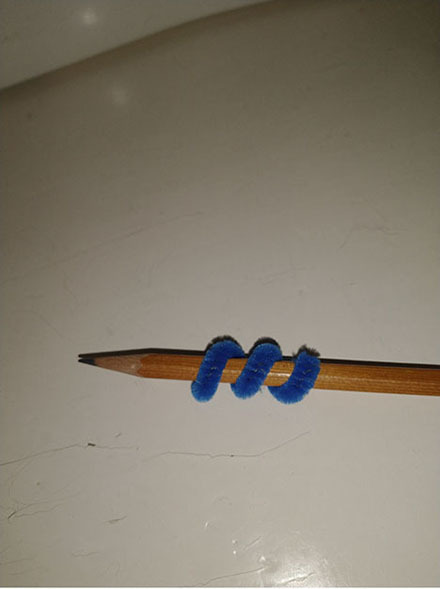
- Glue the antenna onto the caterpillar’s head as shown.