Tales From a Backyard Front: Experiences & Insights from Colorado’s Intellectual and Developmental Disabilities System
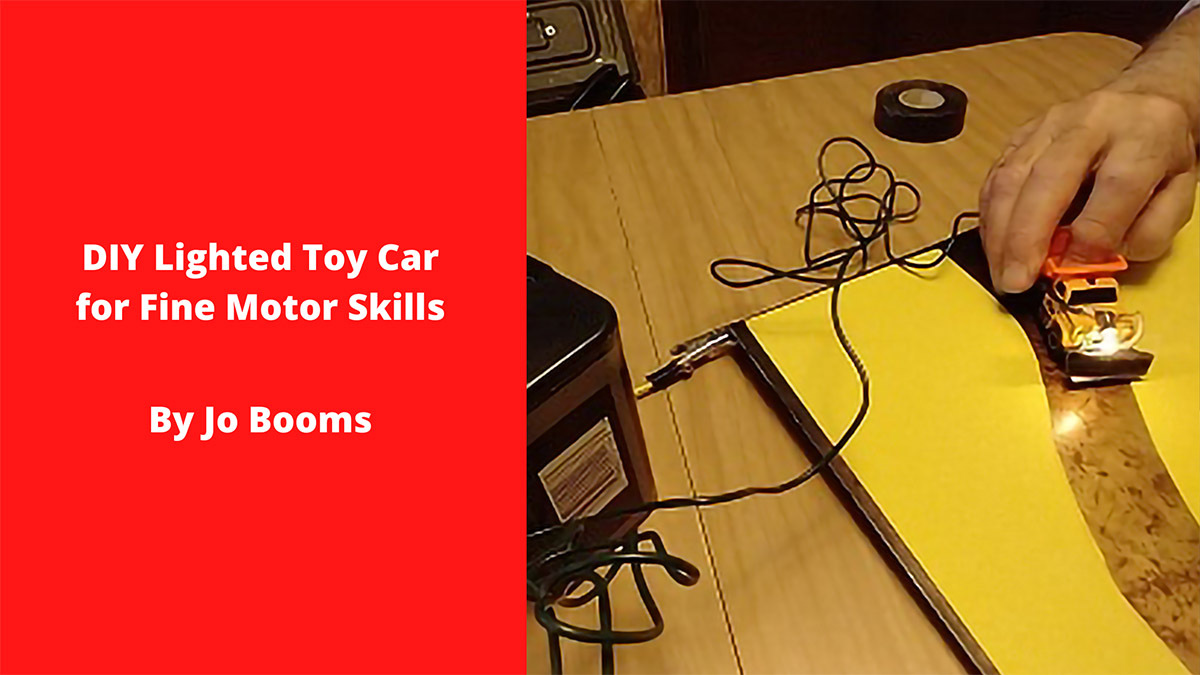
DIY Lighted Toy Car for Fine Motor Skills
NOTE: Arc Thrift Stores is not responsible for the content of guest blogs that appear on the site.
Guest Blog by Jo Booms
Ever needed a fun way for a kid or injured adult to work on fine motor skills? This is something my Mom came up with to help a man with a physical and intellectual disability work on his fine motor skills!
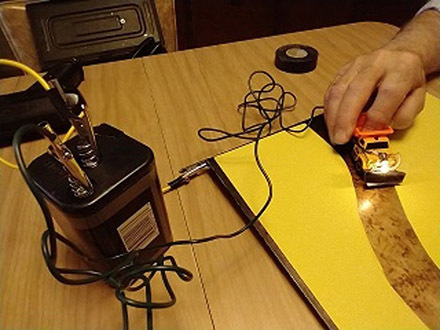
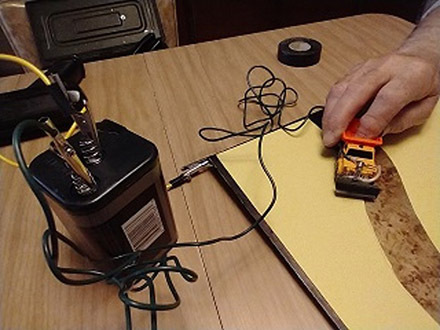
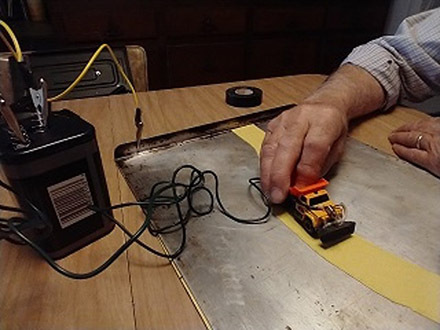
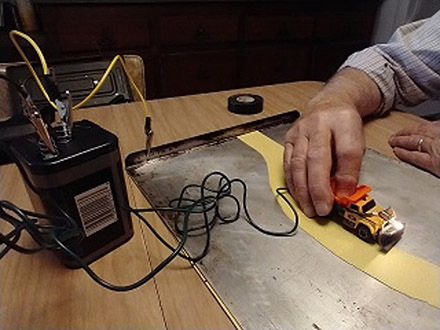
A modified toy car with a light on it is driven across a baking sheet with a paper road or where the paper has been cut away to leave a metal road. As long as the car remains on the paper road, the light will remain off. As long as the car remains on the metal road, the light will remain on. If it goes off either road, the light will change to let the person know they went off the path and need to get back on it. (Don’t worry; this only involves 6 volts, so it’s not enough to shock anyone!)
Materials:
- Pencil
- Ruler
- One metal baking sheet WITHOUT a non-stick coating (check your local ARC thrift store!)
- One or more large pieces of poster board (NOT the foam-core kind)
- Double-stick tape
- Pinch-nose pliers
- Electrical wire cutter/stripper
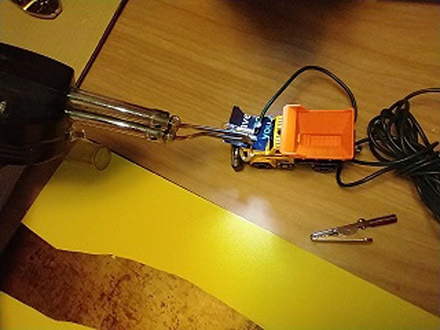
- One toy car
- One 6 volt battery
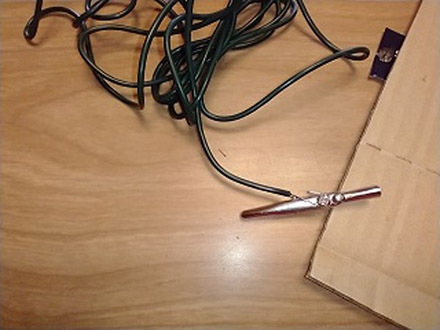
- Three screw-mount alligator clips (check your auto parts store!)
- Screwdriver
- One 6 volt bulb
- One 6 volt bulb mount (the two-pronged kind that will mount to a circuit board)
- One 6-inch piece of solid core electrical wire
- One 1.5-yard piece of flexible stranded electrical wire
- One 15 inch piece of flexible stranded electrical wire
- Electrical tape
- Rosin-core solder for electronics
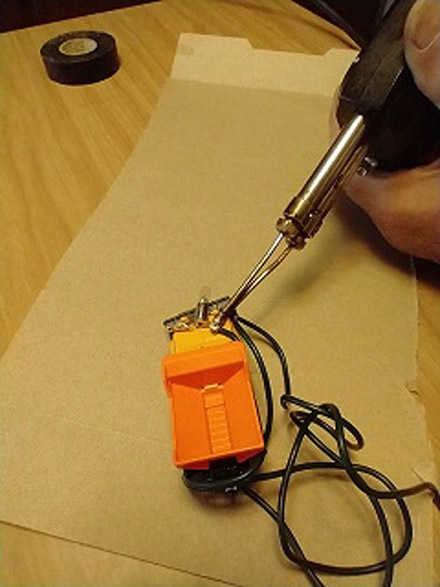
- A soldering iron or soldering gun
- Goop glue
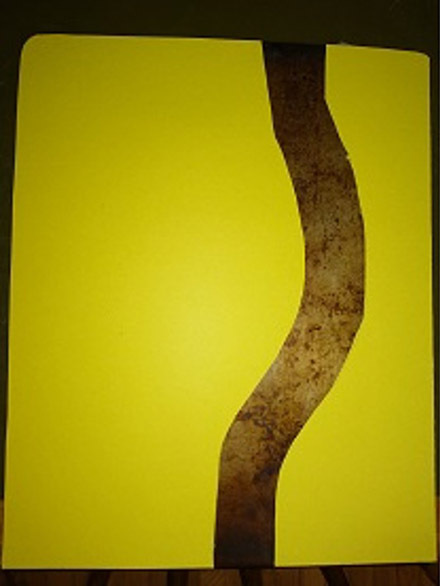
To make the roads:
- Scrub the metal baking pan with a Brillo pad and dry thoroughly; baked-on grime will lessen electrical conductivity.
- Measure the width of the toy car. Add ¼” to get your road width.
- Draw your desired road pattern on a piece of poster board the same size as the baking sheet.
- Cut out the road part.
- Tape the poster board road to one side of the baking sheet with double-stick tape.
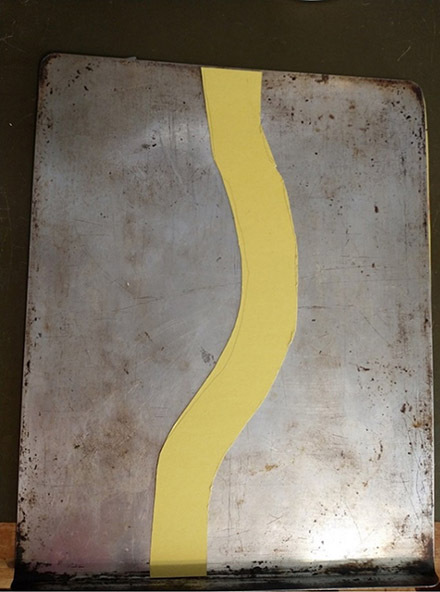
- Flip the baking sheet over and tape the leftover pieces of poster board so the space between them forms a metal road.
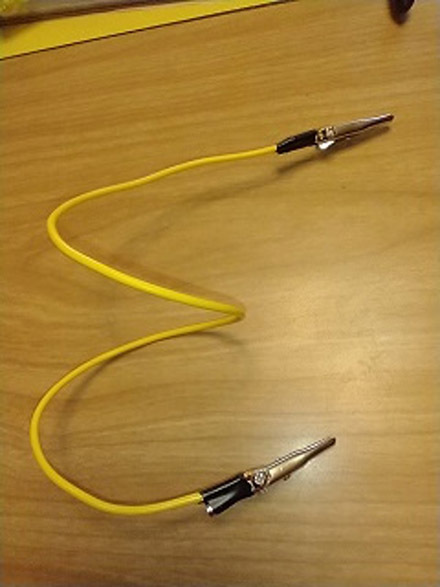
To make the ground wire:
- Take the 15 inch piece of flexible stranded wire. Strip 1 inch of insulation off each end with the wire cutter/stripper.
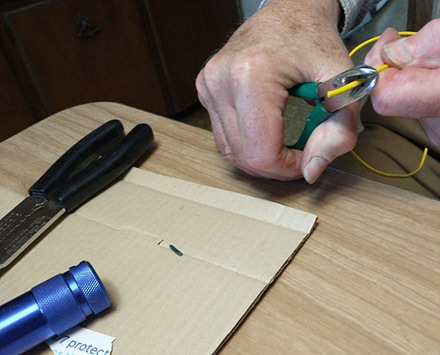
- Twist each end of stranded wire so the strands are twisted over each other.
- Using the soldering iron, “tin” each end of the wire by coating it with hot solder.

- Partially unscrew two of the screw-mount alligator clips.
- Using the pinch-nose pliers, bend each end of the wire so it fits snugly around one screw mount.
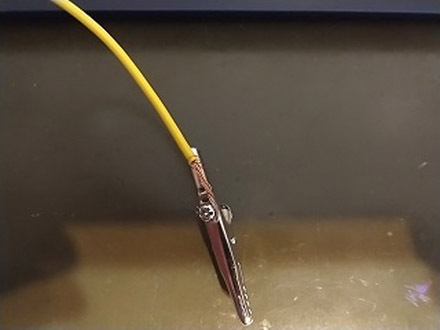
- Tighten the screw mounts down so each end of the wire is attached to one screw-mounted alligator clip.
- Wrap with electrical tape to keep wire in place.
To make the trailer wire:
This wire trails off the bottom of the car and will drag across the road.
- Take the 6-inch piece of solid core wire and bend it around the car body so that one end is under the car and the other end lies across the hood. Cut the wire to the length needed.
- Strip half an inch of insulation off the end of the wire that will be over the hood.
- Strip 1 inch of insulation off the end of the wire that will be under the car. Bend wire down as shown so that the wire will drag across the road when the car is pushed.
- Tin the hood end of the trailer wire.
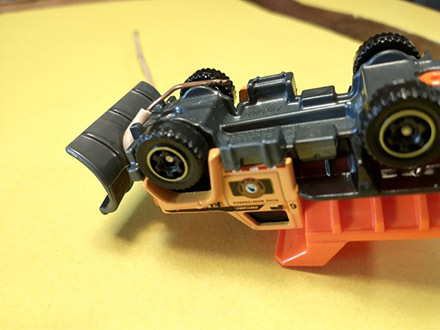

- Tape the trailer wire to the toy car with electrical tape. Then, glue trailer wire firmly in place with Goop glue and let dry.
- Place a piece or scrap paper beneath the hood wire as shown.
- Bend the prongs of the bulb mount apart, then screw the 6 volt bulb into the bulb mount.
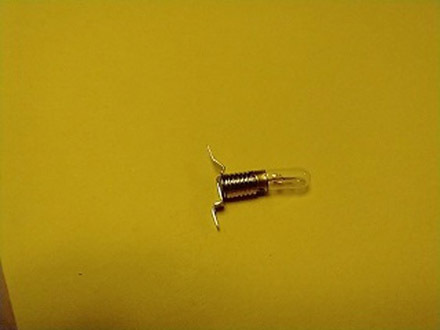
- Solder the hood end of the wire to one prong of the bulb mount.
To make the running wire:
- Take the 1.5 yard piece of stranded wire. Strip 1 inch of insulation off each end.
- Twist each end of the stripped wire so that it is twisted upon itself.
- Tin each end of the running wire.
- Partially unscrew one screw-mount alligator clip.
- Bend one end of tinned wire so that it curls to fit around the screw-mount alligator clip.
- Solder other end of running wire to the remaining bulb mount.
- lip the ground wire to one terminal of the 6 volt battery.
- Clip the other end of the ground wire to the metal baking sheet.
- Clip the running wire to one terminal of the 6 volt battery.
- Drive the car on & off the paper or metal road and watch the light let you know when you’re off the path!